Adding Elements to a Model Using System Explorer
Although you are able to add elements to a Model using System Explorer, it is not recommended. The reason we do not recommend it is, if you add the Element to the Model in System Explorer and then open the Model display that is in synchronization with the model, the new Element symbols all appear on the bottom left of the display. Therefore, we recommend that you always add elements using the Model so that you are able to choose the position of each element. Though not recommended, you are still able to add elements to a Model using System Explorer, so we have provided the steps below.
Note: To add a New Element to a model, you have to first create the new Element if it does not already exist in the database Element list, and then you can add it to the model.
To add an Element that is already in the database Element list, follow these steps:
Open System Explorer.
If you have not yet created a model, do that first as described in Creating a Sigmafine Model.
In the navigation pane, click on Elements to open the Elements pane.
From the Elements tree view, select the Element you want to add.
In our example, we are adding ‘SF_GaugedTank1’ to the new model ‘Model1’. Reference type for adding an Element to a Model should be a ‘Weak-Reference’ (default for this situation).
Use one of the following methods to add the selected Element to the model.
Drag the Element to the Model node in the tree (as shown in the following example).
 EXAMPLE: Drag Element to model
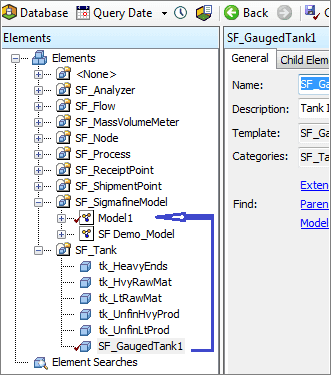
The System Explorer adds the Element to the elements list.
Use the 'Add Element Reference' option to add one or more elements.
Note: This is the recommended method, as it makes it much easier to add multiple elements to the model.
To use the 'Add Element Reference' option:
In the Elements tree view, right-click on the Model and select New > Add Element Reference….
EXAMPLE: Select New > Add Element Reference...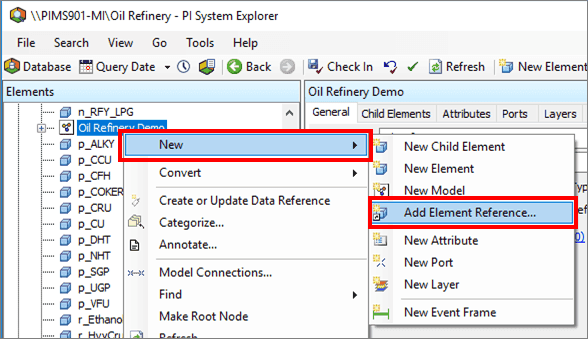
The Add Element window opens, allowing you to select either a single Element or multiple elements.
Follow the appropriate steps to add either a single Element or multiple elements.
Under Element, select the Single option (if not already selected by default).
In the Single box, start typing the Element name to display a list of corresponding elements.
Select the Element you want from the list.
EXAMPLE: Add Element(s) window - start typing to select element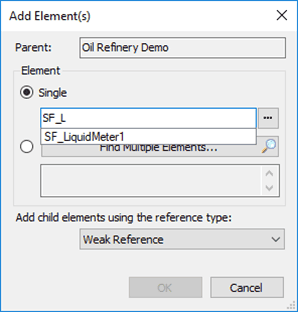
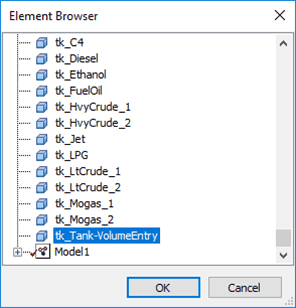
Alternatively, you can to click on the
 ellipsis button to open the Element Browser window where you can select the Element from the corresponding list.
Click OK to add the Element and close the window.
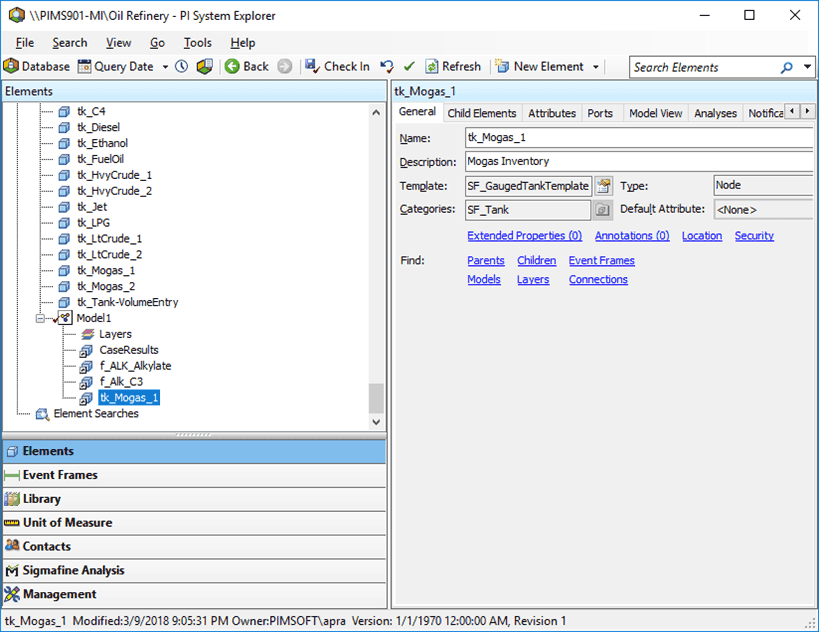
The Element is added to the Model and appears in the Element list under model.
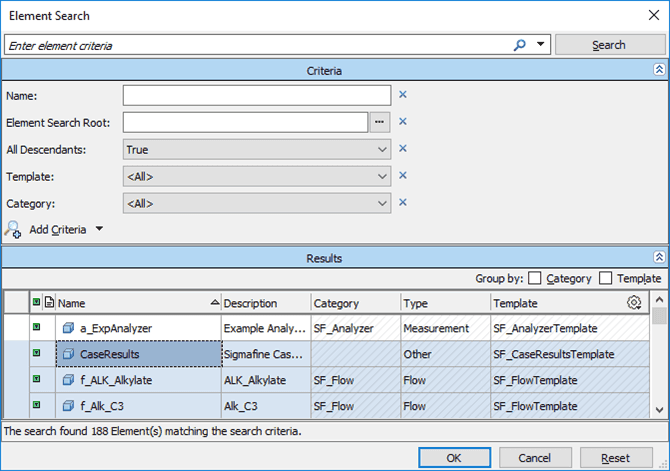
In the Add Element(s) window, under the Element section, select the Find Multiple Elements... option.
The Element Search window opens.
Enter and/or select the search criteria to use for finding the elements you want to add.
Click the Search button.
In the Results pane, select the elements you want to add.
Click OK to save your selections and close the Element Search window.
The elements are added to the Model and appear in the Element list under that model (as shown in Figure 166).